States that most furniture manufacturers seldom sand above 150 grit.
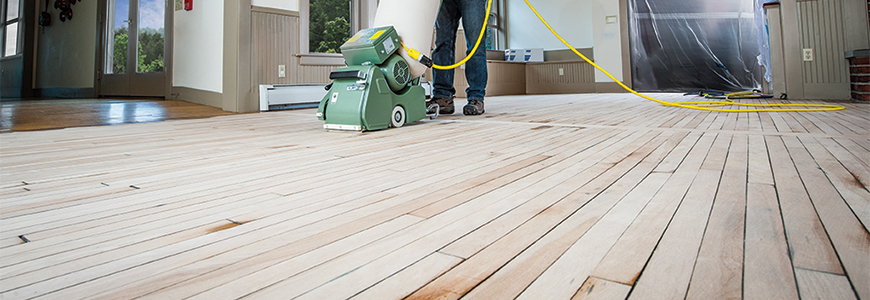
Floor sanding grit progression.
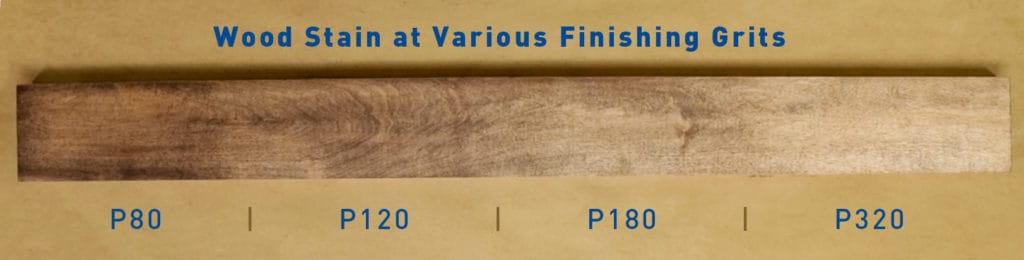
Sanding to 200 grit and above will polish the surface and hinder pigment stain penetration.
This process will give you a beautifully clean new looking floor with minimal waste and provide a good surface for finish that will maximize it s life.
That way you ll get a heads up on and hopefully the knowledge to avoid some of the problems you might encounter and some of the mistakes beginners make.
Always use the same grit progression on all areas whether drum edge or hand sanding.
This is usually the final grit for most standard hardwood floors.
Skip 80 grit and finish sanding with a 100 grit.
Sweep or vacuum the floor before you move up to the next grit.
This is usually the final grit for maple birch or other particularly hard woods and for any floor that you would like to stain.
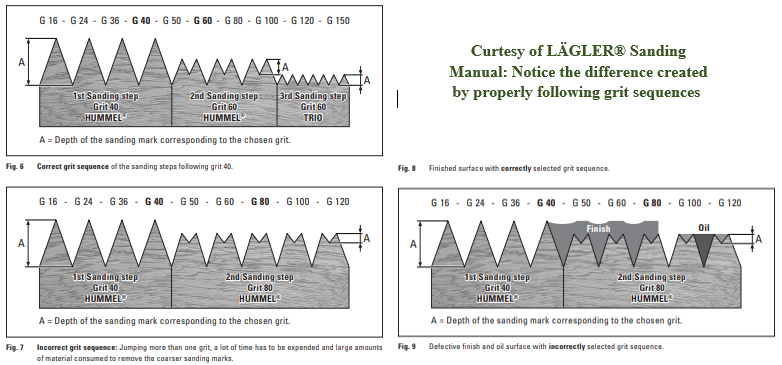
Jump under 100 points with coarse papers 100 or more with medium and 200 or more with very fine papers.
A typical first cut with an edger is 60 or 80 grit then completed with 100 grit after the floor has been filled.
In general begin with a 20 to 60 grit and end with 120.
But most of us sand more than we need to so it s often more efficient to skip grits.
Wrap the vacuum nozzle with tape to avoid marring the floor.
The rotary cut of the edger is the most aggressive cut of all the floor sanding machines.
Takes out 60 or 80 grit scratch.
Knowing how to keep the scratch pattern with the grain as much as possible minimizes edger swirl marks.
We would start with a 40 grit skip 50 grit and sand with a 60 grit.
Replace the abrasive belt after sanding about 250 square feet for most effective results.
Sanding grit estimates vary according to the condition of your floor.
Even the best abrasives throw off a few granules while sanding.
Can take out the scratch from 120 grit or 100 grit sandpaper if necessary.
Start with coarse sandpaper of 36 to 40 grit progress to a medium 60 grit paper and finish with a finer 100 grit.
You may choose to skip the 20 grit pass if the floor is relatively smooth.
Dresdner offers the following rule of thumb for grit progression.
None of it is rocket science but it will help you to read through all the sanding pages including first things first working with sanders and edgers and the sanding faq before you begin.
And a 36 grit granule caught under a 60 grit belt will leave an ugly gash in the floor.
Unquestionably the most efficient progression is to sand through every grit 80 100 120 150 180 sanding just enough with each to remove the scratches of the previous grit.